 704.228.7788
 704.228.7788
 09/06/2024
 10 minutes Read
The best time of year to remove moss from roof surfaces is spring or fall, and knowing why comes down to understanding what moss is doing to your shingles in the first place. Those soft green mats look harmless, even charming, but they hold moisture against your roof around the clock, and in Charlotte’s humid climate they spread fast, especially on shaded, north-facing slopes. Left alone, moss lifts shingles, traps water, and shortens the life of your roof. The good news is that removing it is straightforward if you do it at the right time of year and with the right method. This guide covers the best season to remove roof moss, the safe way to do it, and how to keep it from coming back for homeowners in Huntersville and surrounding areas.
Here’s what you’ll learn in this guide:
- The best season for moss removal: Why spring and fall beat summer and winter.
- The safe method step by step: How to remove moss without wrecking your shingles.
- What never to do: The common mistakes that cause more damage than the moss.
Why Moss Is a Problem on Your Roof

Moss isn’t just a cosmetic issue. It actively damages the roof it grows on, and the longer it sits, the more it costs you. Understanding the damage is the reason to act instead of ignoring it.
How Moss Damages Shingles
Moss doesn’t have roots. It absorbs water directly through its leaves, which means it holds moisture against your shingles constantly. That trapped moisture is what does the damage, and it compounds over time as the moss thickens and catches more debris. If moss is starting to grow on your roof, here’s what it’s doing underneath.
- Traps moisture: Moss holds water against the shingles around the clock.
- Lifts shingles: As moss grows into seams, it lifts and separates shingle edges.
- Creates leak paths: Lifted shingles let water reach the underlayment and deck.
- Accelerates rot: Constant moisture rots decking and deteriorates shingles faster.
- Shortens lifespan: Untreated moss can take years off your roof’s service life.
Why Charlotte-Area Roofs Are Prone to Moss
Moss needs three things: moisture, shade, and an organic surface to grip. Charlotte’s climate delivers all three. Humid summers, frequent rain, and heavily treed neighborhoods create ideal moss conditions, and moss grows on roofs fastest on the slopes that stay damp longest.
- High humidity: Charlotte’s humid subtropical climate keeps roofs damp.
- Shaded slopes: North-facing slopes get the least sun and stay wet longest.
- Tree cover: Overhanging branches drop debris and block drying sunlight.
- Debris buildup: Leaves and pine needles decompose into the organic layer moss needs.
- Poor drainage: Clogged gutters keep the roof edge wet and moss-friendly.
The Best Season to Remove Roof Mosss

Spring and fall are the best times to remove roof moss. Both offer mild temperatures and natural moisture that make moss easier to remove without damaging shingles. Here’s how each season stacks up.
Spring: One of the Two Best Windows
Spring is a strong time for moss removal. Moderate temperatures and regular rain keep moss damp and easier to lift, and clearing it in spring stops it from spreading through the warmer months ahead.
- Mild temperatures: Comfortable, safe conditions for working on the roof.
- Natural moisture: Spring rain keeps moss soft and easier to remove.
- Stops spread: Removing moss early prevents warm-season growth.
- Prevention timing: A great window to apply zinc treatments for the year.
- Watch for: Unpredictable spring storms can delay the work.
Fall: The Other Best Window
Fall is the other ideal season, and arguably the most important. Removing moss in fall gets your roof clean and protected before winter, when trapped moisture can freeze and cause real damage.
- Comfortable conditions: Mild fall temperatures make roof work safer.
- Pre-winter protection: A clean roof heads into winter without trapped moisture.
- Natural moisture: Fall rain helps loosen moss for removal.
- Debris season: Clear falling leaves at the same time to remove moss food.
- Watch for: Leaf debris adds cleanup but is worth handling together.
Summer and Winter: Why They’re Not Ideal
Summer and winter both work against you. Summer bakes moss dry and hard, making it cling to shingles, and the heat makes roof work dangerous. Winter brings ice, snow, and slick surfaces that make working on a roof genuinely hazardous.
- Summer heat: Dangerous roof temperatures and dried, stubborn moss.
- Summer clinging: Dry moss attaches harder and tears at shingles when removed.
- Winter ice: Cold, wet, slick roofs are a serious fall risk.
- Winter daylight: Short days limit working time.
- Winter dormancy: Moss growth slows, but the safety risk outweighs the benefit.
6 Step Method to Remove Roof Moss Safely
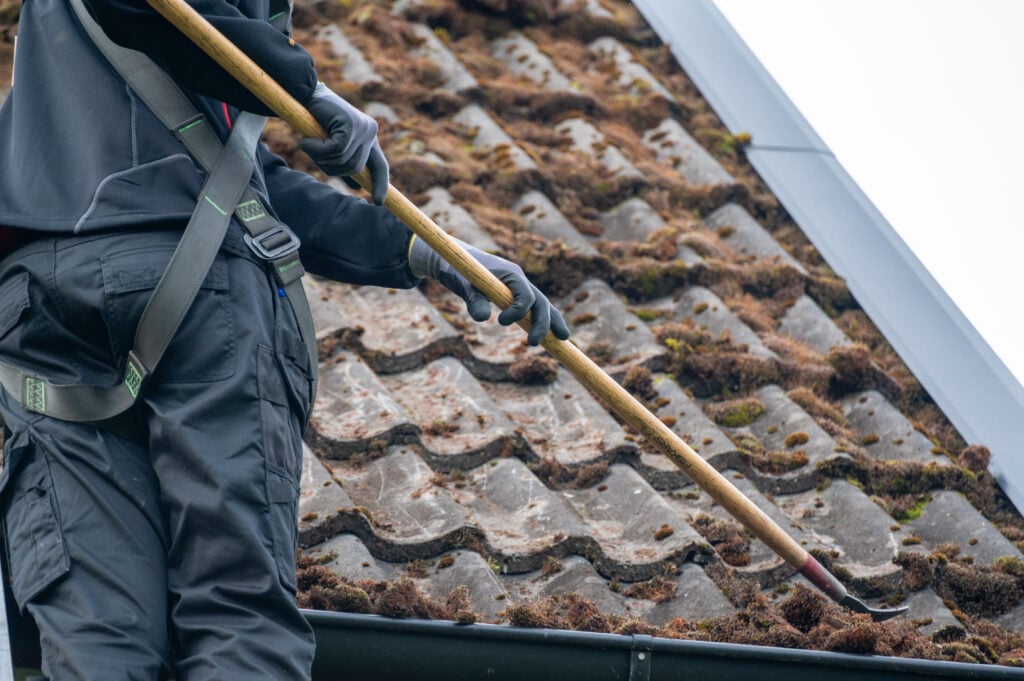
Now that you know when to do it, here’s how to remove moss the right way. The goal is to kill and lift the moss without stripping the granules that protect your shingles. Work gently, work downward, and never rush it.
1. Gather the Right Supplies
Start with the right gear. The wrong tools, like a metal scraper or a pressure washer, cause more damage than the moss ever would. Stick to soft tools and gentle solutions.
- Safety gear: Gloves, eye protection, non-slip shoes, and a roof harness if possible.
- Soft-bristle brush: A long-handled brush, never a metal tool.
- Garden hose: A standard nozzle, never a pressure washer.
- Gentle cleaner: A commercial roof moss product or a mild solution.
- Landscape protection: Tarps to shield plants below from runoff.
2. Put Safety First
Roof work is where most homeowners get hurt. Steady ladder, dry conditions, and a harness if you have one. If the roof is steep, tall, or wet, this is the point to call a professional instead.
- Ladder stability: Position on flat ground with a stabilizer.
- Dry roof only: Never work on a wet or slick surface.
- Harness: Use a roof harness and anchor when possible.
- Ladder height: Extend the ladder about 3 feet past the roofline.
- Know your limit: Steep or high roofs are a job for pros.
3. Apply a Gentle Cleaning Solution
Wet the moss and apply a gentle moss-killing solution. Commercial roof moss products and mild solutions like oxygen bleach are safer for shingles and landscaping than full-strength chlorine bleach, which can damage both. Let the solution sit for 15 to 20 minutes.
- Commercial products: Roof-specific moss killers are formulated to protect shingles.
- Oxygen bleach: A gentler alternative to chlorine bleach.
- Dwell time: Let the solution sit 15 to 20 minutes to loosen the moss.
- Avoid full-strength bleach: Concentrated chlorine bleach harms shingles and plants.
- Protect landscaping: Cover and rinse plants exposed to any runoff.
4. Gently Brush the Moss Away
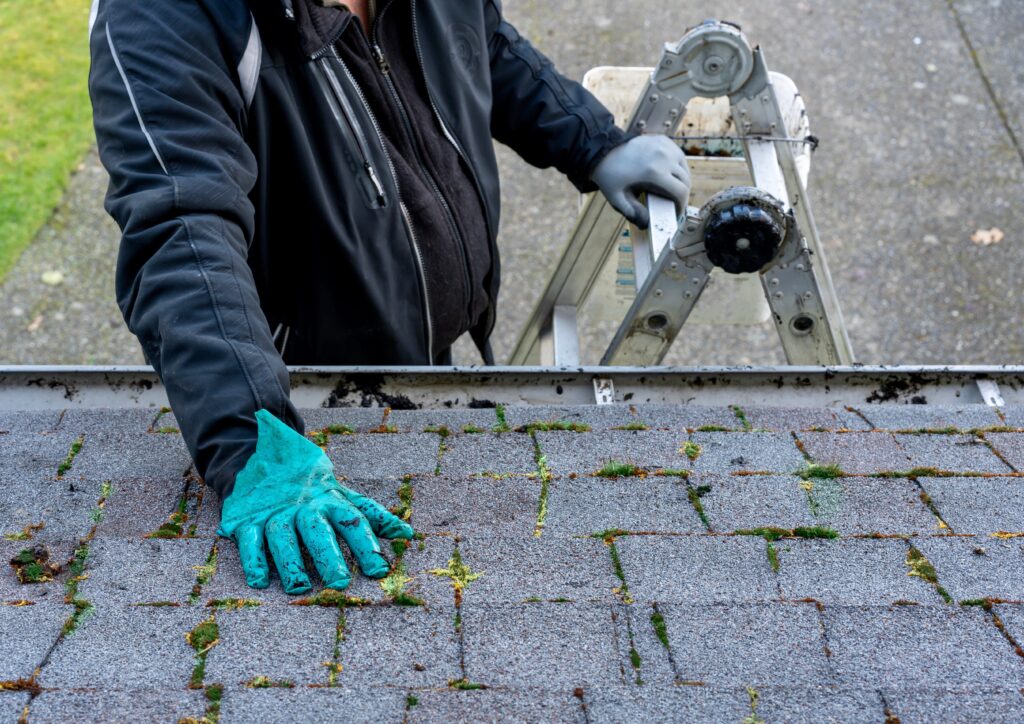
Use the soft-bristle brush to lift the moss, always brushing downward with the grain of the shingles. Brushing upward lifts shingle tabs and forces moss deeper into the seams. Let the brush do the work without gouging.
- Brush downward: Always work with the shingle grain, peak to eave.
- Never scrub upward: Upward brushing lifts and damages shingle edges.
- Gentle pressure: Dislodge the moss without scraping the granules.
- No metal tools: Metal scrapers tear the shingle surface.
- Work in sections: Clear one area fully before moving on.
5. Rinse With Low Pressure
Rinse the treated area with a garden hose on standard pressure, working downward. Never use a pressure washer, which strips granules and forces water under the shingles.
- Low pressure only: A standard garden hose, never a pressure washer.
- Rinse downward: Work peak to eave so water sheds properly.
- Clear residue: Wash away loosened moss and cleaning solution.
- Check gutters: Make sure runoff and debris clear the gutters.
- Rinse plants: Give landscaping below a fresh-water rinse.
6. Inspect and Prevent Regrowth
Once the moss is gone, inspect the roof for damage the moss may have caused, then take steps to keep it from coming back. This is where zinc or copper strips earn their keep.
- Inspect shingles: Look for lifted, cracked, or damaged shingles to repair.
- Install metal strips: Zinc or copper strips along the ridge inhibit regrowth.
- Trim branches: Cut back overhanging limbs to add sunlight.
- Clean gutters: Keep gutters clear to prevent moisture backup.
- Clear debris: Blow off leaves and needles that feed moss.
What Never to Do When Removing Roof Moss

This section matters as much as the method. The most expensive moss damage we see isn’t from the moss itself. It’s from homeowners removing it the wrong way and destroying their shingles in the process.
The Mistakes That Wreck Shingles
Each of these shortcuts feels faster in the moment and costs far more in the long run. Avoid them entirely.
- Pressure washing: Strips protective granules, forces water under shingles, and can void your warranty.
- Metal scrapers: Tear the shingle surface and create leak points.
- Scrubbing upward: Lifts shingle tabs and drives moss deeper into seams.
- Full-strength bleach: Damages asphalt shingles and kills surrounding plants.
- Working on a wet roof: The single biggest cause of roof-cleaning injuries.
How Zinc and Copper Strips Prevent Moss
Metal strips are the best long-term moss prevention there is. Installed just below the ridge, zinc or copper strips release ions every time it rains, and those ions wash down the roof and make the surface hostile to moss, algae, and lichen. They cost $50 to $150 for a typical home and last 10 to 20 years.
- How they work: Rain releases metal ions that inhibit moss growth.
- Placement: Installed just below the ridge cap, running the roof’s length.
- Cost: Roughly $50 to $150 in materials for a typical home.
- Lifespan: Effective for 10 to 20 years.
- Timeline: Prevention, not a cure. Results show over 1 to 3 months on new growth.
When to Call a Professional for Moss Removal
DIY moss removal works for many homeowners, but not every situation. Steep roofs, tall homes, heavy moss coverage, and any sign of underlying damage all call for a professional. Professional moss removal typically runs $250 to $600 for a standard home, which is far cheaper than the premature roof replacement that untreated moss eventually causes costly repairs down the line.
- Steep or tall roofs: The fall risk outweighs the savings of DIY.
- Heavy coverage: Years of growth may hide underlying damage.
- Signs of damage: Curling, cracking, or missing granules need a professional assessment.
- Warranty concerns: A pro protects your manufacturer warranty during cleaning.
- Annual maintenance: Many roofers include moss inspection in yearly maintenance.
Keeping Your Roof Moss-Free for the Long Run
Removing roof moss is a manageable job when you do it in the right season, with the right method, and without the shortcuts that damage shingles. Spring and fall are your windows, gentle solutions and soft brushes are your tools, and zinc strips plus good roof maintenance keep the moss from coming back. For a deeper walk-through of the process, This Old House offers a solid homeowner overview. When the roof is too steep, the moss is too heavy, or you spot damage underneath, that’s when to bring in a pro. As a GAF Master Elite Contractor and CertainTeed SELECT ShingleMaster in the top 3% of roofers nationwide, Roof Medic inspects first and recommends second, telling you honestly whether your roof needs a cleaning, a repair, or just better prevention. Schedule your seasonal roof maintenance with Roof Medic today for guidance on keeping your roof protected. We work with homeowners throughout Huntersville and surrounding areas and we’re happy to walk you through your options. Contractor


